Monday, February 23, 2015

Blissful Butterfly

I just love this card! I do need to let you know that it is a shameless CASE (copy and share everything) of a card I found on Pinterest. All products are Stampin' Up! 


The original card was showcased on Terri Mongeon's blog here. I made a few changes, such as the background color of ink for the Hardwood stamp, the card base is Crumb Cake instead of Blackberry Bliss and I used a different embellishment, but I think you can see from Terri's card exactly why I wanted to make this one. It is gorgeous. 


A few tips:  To save on card stock, I cut the butterfly from the Blackberry Bliss layer before adhering all pieces together. Don't forget to stamp the envelope. It completes the entire look. Also, gently use a bone folder to shape the butterfly wings. 


Product details:
Built for Free Using: My Stampin Blog


Sale-A-Bration is going on now! Earn yourself a FREE Stampin' Up! product gift with every $50 purchase. (before shipping & tax) See all of the Sale-A-Bration details here. 


Check out the Weekly Deals! Save up to 25% on the items below. There are also still some amazing items on the clearance rack. 

Built for Free Using: My Stampin Blog


As always, thank you for visiting my blog. Let me know if you have any questions about the project or any of the Stampin' Up! supplies I've used. 

Artfully Yours,
Kim

Sunday, February 22, 2015

Designer(ish) Butterfly

I was trying to make a card with a collage look yesterday, using a few different floral stamps. The look I wanted to achieve was escaping me. I figured I would leave it alone until today and maybe, just maybe I could figure out what to do to make it work visually. All products are Stampin' Up!


Well, it turned out that that best way to make it work visually, was to cut a butterfly from the piece I had been collage stamping on. I find that I often use my butterfly dies this way.


Look at the depth of the design on the butterfly. It makes me think of high end designer fabric, possibly something that might be used for bedding or pillows. I think the font of the Happy Birthday stamp works perfectly with this card and the look of the butterfly. The Butterfly Basics Bundle is a "must have". 


The center strip of of washi tape is from the Color Me Autumn Designer Washi Tape, that just happens to be on clearance right now. The other strips are the Stacked With Love Designer Washi Tape from the Occasions Catalog. I used a Daffodil Delight Blendabilitie to deepen the color of the Crushed Curry Bakers Twine before threading it through the button. 

Product list:

Built for Free Using: My Stampin Blog


Sale-A-Bration is going on now! Earn yourself a FREE Stampin' Up! product gift with every $50 purchase. (before shipping & tax) See all of the Sale-A-Bration details here. 


Check out the Weekly Deals! Save up to 25% on the items below. There are also still some amazing items on the clearance rack. 

Built for Free Using: My Stampin Blog


As always, thank you for visiting my blog. Let me know if you have any questions about the project or any of the Stampin' Up! supplies I've used.

Artfully Yours,
Kim

Thursday, February 19, 2015

Painted Petals/Soft & Blingy Mix

I must confess. I have been perusing Pinterest this morning. I saw a similar card using brighter colors, but for some reason Coastal Cabana and Baked Brown Sugar jumped in to my head. (Just love that combination) All products are Stampin' Up!


I think this card is just the right amount of soft AND blingy. And look...it looks good no matter which orientation you use!


For the little hap-hazard looking strings under the focal point, I cut a piece of the Coastal Cabana Thick Baker's Twine and pulled it apart. Before I adhered the round layer, I laid down about a one inch strip of Snail. Then I just randomly stuck down the pieces of thin twine until it looked the way I wanted it to. I colored the pearls with Coastal Cabana Blendabilities. I just love that you can custom color your pearls and rhinestones with Blendabilities. Since they are alcohol based markers, they dry on non-porous surfaces. I adhered the single sequins with Glue Dots. 


Don't forget to decorate the envelope. This brings the entire project together and really adds a personal touch. 


I hope you've liked this project. Don't forget to switch up the orientation on your cards, it will give you more possibilities!

Product details:


Built for Free Using: My Stampin Blog


Sale-A-Bration is going on now! Earn yourself a FREE Stampin' Up! product gift with every $50 purchase. (before shipping & tax) See all of the Sale-A-Bration details here. 


Check out the Weekly Deals! Save up to 25% on the items below. There are also still some amazing items on the clearance rack. 


Built for Free Using: My Stampin Blog


As always, thank you for visiting my blog. Let me know if you have any questions about the project or any of the Stampin' Up! supplies I've used.

Artfully Yours,
Kim

Wednesday, February 18, 2015

Lotus Blossom Thank You

A simple, but striking thank you note for a client. In this internet age, I find that a handmade card really says "I care". All products are Stampin' Up! By the way, I'm having fits with my lighting on photos lately. This card is white, but seems to have a yellow cast in this photo. Tried and tried to fix it, but can't seem to...


I just love the Lotus Blossom set from Sale-A-Bration. It's so simple to create something quite stunning. Just spend $50 (before tax & shipping) from any of the catalogs or sale items and you can chose this set as your Sale-A-Bration gift. It is photopolymer, which makes it a snap to line up the images. 


For the flower, I only used 2 of the 3 parts of the flower. I embossed the top layer and the stem with Black Stampin' Emboss powder. A little tip: take your 2-Way Glue Pen and while pressing the edge of the tip against the card stock run down the edge. Then, put embossing powder on it just as if it was the Versamark you normally emboss with. Heat with your heat tool as you normally would. I do this one side at a time.  I just love that little bead of black on the edge! The ribbon was some I had left over from the Holiday Catalog. The "thanks" is from the very versatile Crazy About You stamp set. 

Product details:


Built for Free Using: My Stampin Blog


Sale-A-Bration is going on now! Earn yourself a FREE Stampin' Up! product gift with every $50 purchase. (before shipping & tax) See all of the Sale-A-Bration details here. 


Check out the Weekly Deals! Save up to 25% on the items below. There are also still some amazing items on the clearance rack. 


Built for Free Using: My Stampin Blog


As always, let me know if you have any questions about the project or any of the Stampin' Up! supplies I've used. Hope your day is warm, the wind chill is below zero in my town as I type this!

Artfully Yours,
Kim

Tuesday, February 17, 2015

Cheery Birthday Card For A Friend and New Weekly Deals

I made this card earlier in the month for a good friend of mine who was having a birthday. It's always a challenge making a card for another papercrafter...you want everything to be "just so". All products are Stampin' Up! If you are receiving this blog update via email, you may have to click on over to the web page to see all photos & supplies used. 


The flowers on this card are from the set called Indescribable Gift, which is in the current Occassions Catalog. 


I wanted to make this card a combination of classic & modern, so in order to add color to the flowers, I used the larger "splat" stamp from Gorgeous Grunge. 


If you don't own Gorgeous Grunge, you MUST have it. It pretty much never leaves my stamp table. There are so many things you can use it for. 


The "happy" die cut and the "birthday" stamped image are from the "Hello You" Thinlits Dies and the "Crazy About You" stamps. Purchase them as a bundle and save 15%! I embossed Birthday with White Stampin' Emboss Powder, then trimmed the piece and made my own flag ends by using our 1" Square Punch. I popped that piece up with Dimensionals. 


Don't forget to decorate the envelope. It really completes the presentation. 


Product details:

Built for Free Using: My Stampin Blog


Sale-A-Bration is going on now! Earn yourself a FREE Stampin' Up! product gift with every $50 purchase. (before shipping & tax) 
See all of the Sale-A-Bration details here. 


Check out the Weekly Deals! Save up to 25% on the items below. There are also still some amazing items on the clearance rack. 


Built for Free Using: My Stampin Blog


Thank you for stopping by my blog today. If you are not subscribed, please do so using the link on the right side bar.  As always, let me know if you have any questions about the project or any of the Stampin' Up! supplies I've used. 

Artfully Yours,
Kim

Saturday, February 14, 2015

Valentine's Day Elegance

I have a few more cards to share today that I think would also be appropriate for anniversaries, etc. Sometimes, I just love a neutral, elegant look. I think with the addition of vellum and bling, these cards fit the bill nicely. I am also going to share the details of the post I made here yesterday.  This post is a bit long, but you will want to read all the tips & tricks I'm going to share. All products are Stampin' Up!


There are a few tricks I can recommend when using vellum: make sure your hands are clean. The oil from your hands can really show on the surface of vellum. When embossing on vellum, be sure to use the Embossing Buddy to remove static from the surface before you stamp and add your embossing powder. I also always keep a tiny, stiff bristled paint brush hand to remove stray bits of embossing powder. However, even with all of that, a bit of stray embossing powder usually ends up where I didn't intend on it ending up. I just go with it...it's handmade, right? 


The "LOVE" stamp is actually just individual letters from the new photopolymer stamp set called Sophisticated Serifs. The set has 2 sizes of letters and a few other stamps that make this a must have for making your own monograms, or just saying what you want to say! Since these are clear, it is a snap to line them up. 


The "you" word is from the Really Good Greetings stamp set below. I knew I wanted the word "you" and after I really got to looking at my stamps, I realized how cute this stamp was with the tiny heart cut out of one of the letters. I simply used post it notes to cover up the areas of the stamp that I didn't want to ink up, inked the single word, then pulled the post it notes off and stamped it. Very simple trick and gives you tons more mileage from your stamps. 


I also always make sure to put my adhesive on the backside of the vellum under things that I am either embossing or embellishing with so the adhesive doesn't show through. I used half pieces of our Glue Dots to adhere the vellum on these projects. Since I am only putting it under certain spots, the vellum has a cool, ethereal "floaty" kind of look going on. (not sure floaty is a word, but you get the idea). On the card below, I have put a Glue Dot under each sequin. 


See the heart with both embossing and glitter on it above? This was a situation where I knew I wanted that embossed heart to be popped up, but didn't want to fussy cut it. The heart stamp was from January's Paper Pumpkin kit. The negative heart space was cut using a die from the Mini Treat Bag Thinlits. After I stamped and embossed the heart, I punched it out with our  Sweetheart Punch. There were white edges on the heart, since the punch didn't exactly match up. I simply applied glue with my 2-Way Glue Pen and applied my Silver Stampin' Glitter. I really liked the effect and will use this idea again. After all, you can never have enough bling. The final sparkle I added was a few different sizes of sequins from the Frost Sequins in the past holiday catalog. (they are on sale right now).


Product details:

Built for Free Using: My Stampin Blog


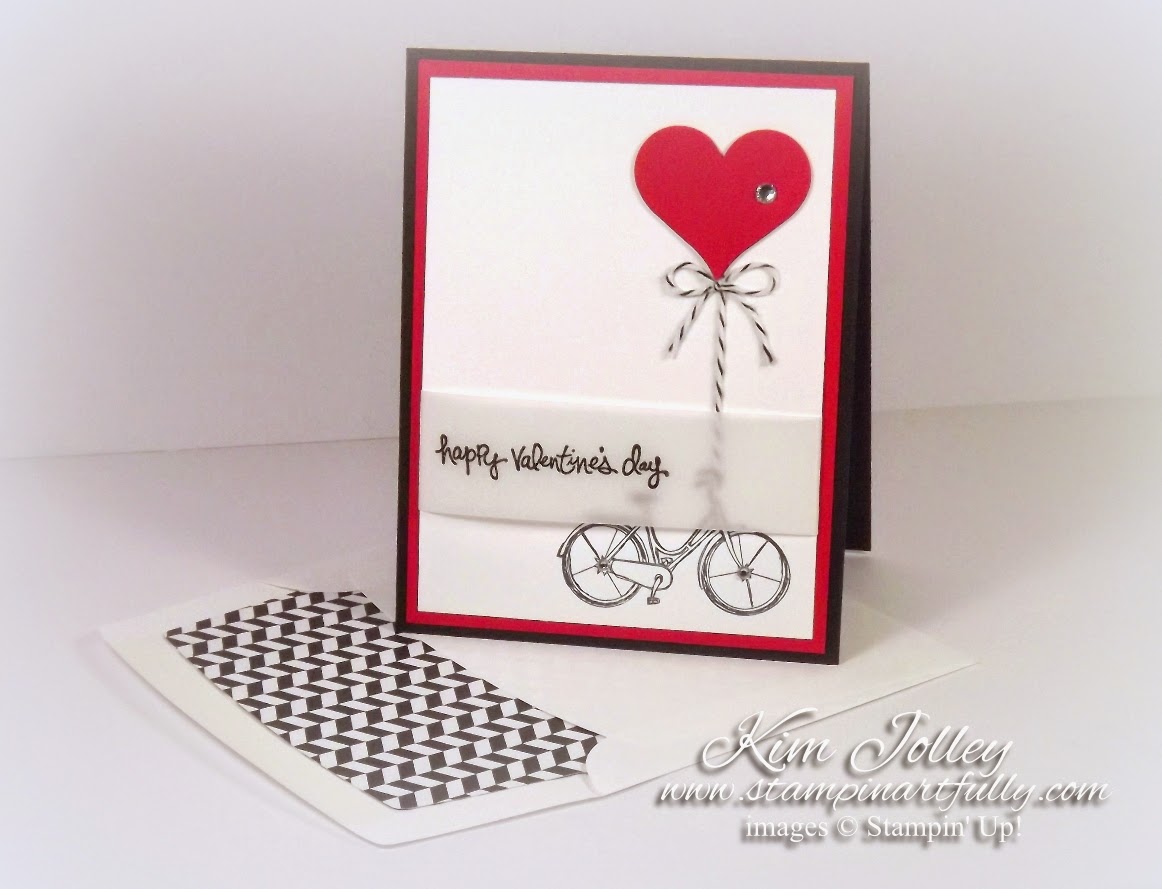
If you read yesterday's post here, you will recall that a late night with a few of the grandkids had me a bit behind yesterday morning. I promised I would give the details on this sweet little card in today's post. 


I watercolored a small piece of paper using Rose Red reinker. After it dried, I punched out the heart with the Sweetheart Punch and added Dazzling Diamonds Glitter using the 2-Way Glue Pen to adhere. I made the polaroid type frame by cutting a rectangle piece of paper and cutting a square out of the center using the a die from the Squared Collections Framelits. The tiny flowers are from the Sheltering Tree stamp set. The "clothesline" is made from Painted Blooms Cotton Twine and stapled with the Handheld Stapler. The tiny clothespin is from a past Paper Pumpkin kit. The "I Love Us" is from the Good Greetings stamp set, which was one you could earn last fall. 

Product details:
Built for Free Using: My Stampin Blog


Sale-A-Bration is going on now! Earn yourself a FREE Stampin' Up! product gift with every $50 purchase. (before shipping & tax) See all of the Sale-A-Bration details here. 


Check out the Weekly Deals! Save up to 25% on the items below. There are also still some amazing items on the clearance rack. 

Built for Free Using: My Stampin Blog


Thanks for sticking with me today during this long post.  I hope some of the tips & tricks come in handy and I hope I have inspired you to be creative this weekend.As always, let me know if you have any questions about the project or any of the Stampin' Up! supplies I've used. 

Artfully Yours,
Kim


Friday, February 13, 2015

When In Doubt, Go With A Glittery Heart

This post will be quick as I had a late night with the grandkids last night and I'm already feeling behind this morning. How cute is this card? 


Pretty simple to make and I will give the details in tomorrow's post along with my last few Valentine cards. 


Sale-A-Bration is going on now! Earn yourself a FREE Stampin' Up! product gift with every $50 purchase. (before shipping & tax) See all of the Sale-A-Bration details here. 


Check out the Weekly Deals! Save up to 25% on the items below. There are also still some amazing items on the clearance rack. 


Built for Free Using: My Stampin Blog


As always, let me know if you have any questions about the project or any of the Stampin' Up! supplies I've used. Have a great day...

Artfully Yours,
Kim

Thursday, February 12, 2015

Valentine's Day

Life has been a bit hectic lately, so this post is long overdue. I've been in the Valentine card mode this week, so you will see a few more before the special day arrives. The card below was inspired by something I saw on Pinterest, but I put my own little spin on it and used all Stampin' Up! products to create it. 


I used the bike stamp from the hostess set Life's Adventure. I used Post It notes to cover the areas I didn't want to ink up. 


The jewels and the funky black & white envelope liner really completes this card. Remember, it's all in the details!


Products used:


Built for Free Using: My Stampin Blog


Sale-A-Bration is going on now! Earn yourself a FREE Stampin' Up! product gift with every $50 purchase. (before shipping & tax) See all of the Sale-A-Bration details here. 


Check out the Weekly Deals! Save up to 25% on the items below. There are also still some amazing items on the clearance rack. 


Built for Free Using: My Stampin Blog


As always, let me know if you have any questions about the project or any of the Stampin' Up! supplies I've used. Have a great day...

Artfully Yours,
Kim